Designing a custom wardrobe is a chance to create storage that suits the way you actually live, rather than trying to make clothes and accessories fit into standard flat-pack dimensions. At Silva Wardrobe, we see that the best wardrobe designs begin with practical questions: how much hanging space is really needed, which items should be easiest to reach, and where shoes, jewellery, bags and seasonal pieces should go so they stay organised and in good condition. Your routine, the size and shape of the room, and your longer-term needs will all influence what the final design should look like.
In this article, Silva Wardrobe shares practical insights to help readers make confident decisions before investing in custom wardrobes in Sydney. You will learn how to assess your current storage problems, how room layout affects internal configuration, why accurate measurements matter, and how materials, hardware, lighting and future flexibility can shape the finished result.

A custom wardrobe should work around your life, not the other way around. Before thinking about door styles, finishes or accessories, it is worth understanding what needs to be stored, how often each category is used, and which items should be easiest to access. This early planning helps prevent a new wardrobe from looking great at first but becoming awkward or cluttered once it is used every day.
Wardrobe specialists often encourage clients to begin by looking at how they use their wardrobe each day. Workwear, casual clothing, special occasion outfits, accessories and shoes all place different demands on storage. Once those habits are clear, it becomes easier to decide on the right mix of hanging space, shelving, drawers and internal fittings.
One of the best starting points is a simple wardrobe audit. Take everything out and group it into categories such as long dresses, short hanging, folded knitwear, denim, shoes, bags and accessories. This does more than help with decluttering. It also gives a clearer picture of how much storage each category really needs.
Once everything is sorted, it becomes easier to see what deserves priority space. Someone with lots of coats and long dresses will need more full-height hanging, while someone who mainly wears separates may get more value from double hanging, drawers and shelving. Experienced wardrobe specialists will often measure hanging runs by category so the final design reflects what is actually owned rather than rough estimates.
It also helps to think about accessibility. Frequently worn work clothes, shoes and everyday accessories should sit in the easiest-to-reach areas, while occasional formalwear or seasonal items can be placed in less central sections.
Once you know what needs to be stored, the next step is working out which storage type suits each category best. Hanging space works well for shirts, blouses, jackets, trousers, suits and dresses that crease easily. Drawers are often better for underwear, sleepwear, gym wear and smaller garments that can look untidy on open shelves. Deep shelves can be useful for bags or bulky knitwear, but they are often less practical for tall stacks of everyday clothing that tend to become messy.
Shoe storage also deserves proper thought. Everyday shoes are usually easiest to access when stored around knee or waist height on slanted shelves or pull-out trays, while occasion shoes can go higher up. Accessories such as ties, belts, jewellery and watches are often easiest to manage in shallow drawers with dividers so they stay visible and do not become tangled.
The layout should also reflect who will use the wardrobe and how the space will be used throughout the day. Shared wardrobes often work best when each person has clearly defined zones for hanging space, drawers and shelving. In many cases, wardrobe designers will create balanced layouts on each side so both users have similar functionality.
Reach and height matter as well. Everyday clothing should usually sit between shoulder and hip height, while higher sections can be used for luggage, out-of-season clothing or less frequently used items. If children will also use the wardrobe, lower rails and accessible shelving can make the space easier for them to use and maintain.
When a wardrobe is designed around real storage habits rather than assumptions, it is much more likely to feel practical and intuitive in the long term.
Before finishes or door profiles are chosen, it is important to understand the room itself. Floor space, wall width, ceiling height, windows, doors and circulation space all shape what is possible. A wardrobe should maximise storage without making the room feel cramped or awkward to move through.
Clients who take time to assess the room and think about how they move through it usually end up with a wardrobe that feels more tailored to their routine. The aim is to use the available space well without making the room feel cramped or awkward.
Accurate measurement is the first step. The width of the wall should be checked at floor level, mid-height and near the ceiling because walls are rarely perfectly straight. Ceiling height should also be measured in more than one spot, and any bulkheads, cornices, skirting boards or sloping sections should be noted early.
It is also important to mark the position of doors, windows, switches, power points, vents and any fixed features. A swinging bedroom door, for example, may affect whether hinged wardrobe doors can open properly, while a low windowsill may limit how cabinetry can be designed along that wall.
Clearances matter just as much as measurements. There needs to be enough room in front of the wardrobe for doors to open comfortably and drawers to extend fully. For hinged doors, around 900 mm of clear floor space is often recommended so the wardrobe can be used without frustration.
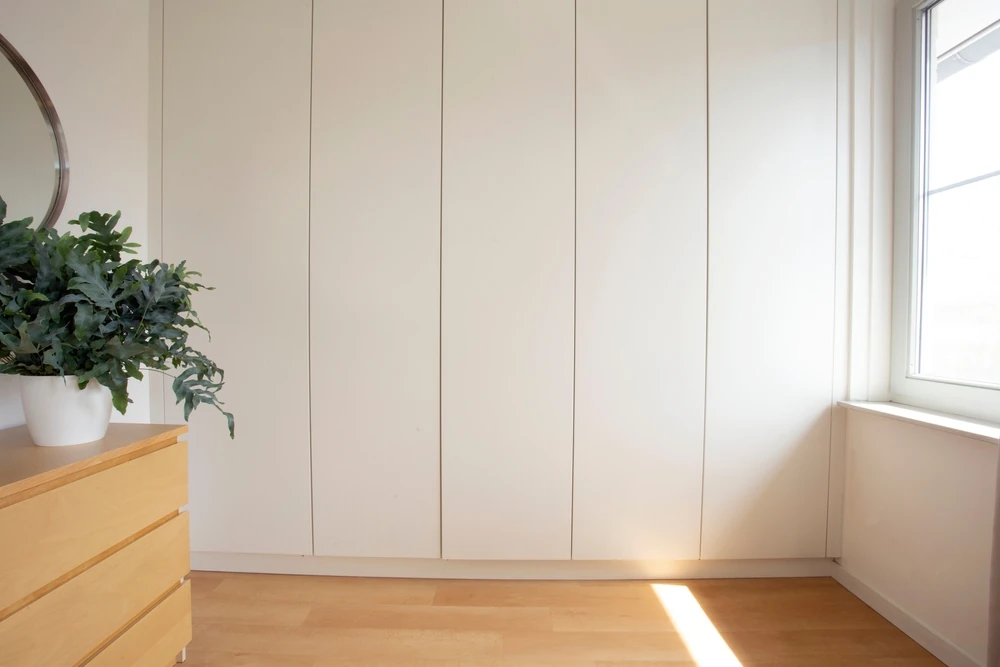
The room itself will usually guide whether a built-in or walk-in design is the better option. A built-in wardrobe suits standard bedrooms, alcoves and narrower spaces because it can run wall to wall and floor to ceiling without taking up more floor area than necessary.
A walk-in layout works best where there is a dedicated dressing room or enough extra space for an L-shaped or U-shaped arrangement. For a comfortable walk-in, wardrobe designers often recommend allowing at least 900 mm between opposing runs of cabinetry so people can move around easily. If the space is tighter than that, a single run of cabinets with open shelving opposite may be a more practical approach.
The right choice depends on the size of the room, how much storage is needed and how the space will be used each day.
A custom wardrobe should be easy to use as well as attractive. Good design comes from thinking about access, visibility and the everyday routines involved in getting dressed and putting things away. The goal is to avoid overfilled rails, shelves that are hard to reach and fittings that feel awkward to use.
When the internal layout reflects daily habits, the wardrobe is usually easier to keep tidy and more enjoyable to use over time.
Functional design begins with a clear idea of how the wardrobe fits into daily life. Someone who wears suits or dresses frequently will need a different layout from someone who mainly stores folded knitwear, activewear and casual clothing. Grouping clothes by category or purpose, such as work, home, gym or formalwear, can help shape the internal arrangement in a way that makes sense.
Everyday items are usually best placed at the most accessible height. Less-used clothing can go in higher sections or secondary compartments. If the wardrobe forms part of a dressing area in the bedroom, it may also make sense to position underwear, jewellery or accessories near a mirror so everything needed for getting ready is in one place.
Internal fittings and hardware can make a big difference to how usable a wardrobe feels. Full-extension soft-close drawers let you see the contents more clearly without having to rummage at the back. Shallow drawers suit smaller items such as belts, watches and jewellery, while deeper drawers are better for knitwear, jeans or bulkier folded pieces.
Pull-out fittings can also improve access in deeper or narrower sections. Shoe trays, trouser racks and accessory organisers bring items forward instead of leaving them tucked away in dark corners. Adjustable shelves are another practical feature, especially because storage needs often change over time.
Lighting should be treated as a practical part of the design, not just a finishing touch. Integrated LED strips along vertical panels or beneath shelves can make the wardrobe much easier to use, particularly in darker bedrooms. Handles, drawer pulls and door hardware should also feel comfortable to use and be suited to how often the wardrobe will be opened each day.
Material and finish choices influence cost more than almost any other design decision. They affect appearance, durability, maintenance and the overall feel of the finished wardrobe, so it is worth understanding the trade-offs before making final selections.
In many wardrobes, the internal structure is built from practical, cost-effective board products, while more decorative materials are used on visible fronts and feature areas. Hardware, accessories and detailing then influence the final price further.
Melamine board is one of the most common and budget-friendly options. It is a manufactured board with a durable prefinished surface available in white, woodgrains and solid colours. It works well for internal shelving and simple doors, and it is generally easy to clean. Its edges do need to be finished properly, however, to reduce the risk of chipping over time.
Laminate offers a step up in both durability and design flexibility. It can mimic timber, stone or metal finishes at a lower cost than the real materials, which makes it a popular choice for wardrobe doors, drawer fronts and open shelving where a more refined look is wanted.
Timber veneer and solid timber are premium options. Veneer uses a thin slice of real timber applied over a stable board substrate, which gives the warmth and character of wood without the same cost or movement associated with solid timber. Solid timber offers a richer and more substantial finish, but it is usually the most expensive option and may require more care over time.
Glass, mirrors and metal accents can also add to the cost. Mirror doors, for example, are generally more expensive than melamine or laminate fronts, but they can make a room feel larger and may remove the need for a separate full-length mirror elsewhere in the bedroom.
A custom wardrobe does not automatically mean the storage will work well. Many disappointing results come down to a few common mistakes made during planning rather than during construction. Understanding these issues early makes it easier to ask the right questions and avoid choices that look good on paper but do not work well in practice.
One of the most common mistakes is choosing shelving and hanging arrangements without thinking realistically about the clothing being stored. If the layout includes too much long hanging for someone who mostly wears folded separates, valuable vertical space is wasted. The same problem happens when shoe storage, drawers or accessory space are underestimated.
A better approach is to work from a rough inventory. Knowing approximately how many long garments, short hanging items, pairs of shoes, bags and folded pieces need to be stored will make the internal layout much more accurate and useful.
Poor measuring creates problems that often only become obvious after installation. If the wardrobe is too shallow internally, clothing may sit awkwardly on hangers or press against the doors. In most cases, hanging sections need an internal depth of around 550 to 600 mm to suit standard hangers comfortably.
Clearances also need careful attention. Hinged doors need room to open without hitting furniture or walls. Sliding doors must overlap correctly to close neatly. Drawers should extend fully without catching on nearby obstacles. Ceiling height, bulkheads and sloping ceilings all need to be measured properly so the final fit looks intentional rather than forced.
A professional wardrobe designer or joiner can help turn broad ideas into a practical plan that suits both the home and the people using it. Their role is not just to fit cabinetry into a space, but to interpret storage needs, identify possible design issues and recommend layouts, materials and fittings that will work well over time.
Bringing a specialist into the process early usually leads to a smoother result, especially where flooring, electrical work, skirting or wall finishes may affect the final installation.
Preparation makes the consultation more productive. At a minimum, it helps to have room measurements, ceiling height, photos of the space and the positions of doors, windows, power points and any architectural features ready to discuss.
It is also useful to prepare a simple storage inventory. Approximate numbers of dresses, coats, shirts, shoes, bags, folded clothing and bulky items such as luggage will help the designer recommend the right mix of drawers, shelving and hanging space.
Reference images can help as well. A small selection showing preferred finishes, door styles or internal features gives the discussion a clearer visual starting point, even if the final design ends up looking different.
The process often begins with an in-home or showroom consultation. At this stage, the designer will usually discuss how the wardrobe will be used, who will use it, what the room allows and whether any special features are needed. Requests such as internal lighting, pull-out racks, mirrored panels or extra accessory storage should be raised early so they can be included in the design and budget.
The next step is usually a set of drawings or 3D visuals along with a specification outlining materials, finishes, fittings and hardware. This should give a clear picture of what is included and how the wardrobe will function.
The quotation should explain what is covered in the price, such as design, materials, manufacturing, delivery and installation. It should also outline lead times, payment stages and whether extra work such as removing an existing wardrobe, painting or electrical changes is included or arranged separately.
Once the design is approved, manufacture usually takes place in a workshop before installation is scheduled. At this stage, the client usually only needs to confirm final selections such as colours, handles or finish details.
Before installation, the room usually needs to be cleared and any agreed preparation completed. The installation team will then assemble the wardrobe, secure it in place, scribe it neatly to the walls and ceiling and adjust doors and drawers so they operate correctly. Some noise and dust are normal, but an experienced team should manage disruption carefully and leave the area tidy.
At handover, the finished wardrobe should be checked against the agreed design. This is the right time to confirm that drawers, doors, shelves, lighting and any special fittings are working properly and to raise any small adjustments that may still be needed.
Designing a custom wardrobe involves much more than choosing doors, colours and hanging rails. The best results come from understanding what needs to be stored, how the space can be used well, and which materials and fittings will suit everyday use. Careful planning around measurements, access, internal layout and budget can prevent unnecessary compromises later on.
A well-designed wardrobe should feel simple and natural to use from the first day. When the storage reflects real habits and the layout suits the room properly, the result is more organised, more durable and much more satisfying over the long term.
Here at Silva Wardrobes, we believe that you shouldn't have to compromise on quality when you’re on a budget. We offer a wide range of built in wardrobe designs in varying materials and finishes, so you can get the perfect built in or walk in wardrobe for your home no matter what the budget you're working with.
Proudly Australian owned and made. All our work is carried out locally in Sydney with only the highest level of craftsmanship and comes with a lifetime guarantee.

Contact us for a free measure and quote in the Sydney metropolitan area. We send out a qualified tradesman, not just a salesman.

We then create all the components to your perfect built in wardrobe to exact specifications using only the highest quality materials

A wardrobe technician will then deliver and install your wardrobe ensuring you are 100% happy with the job before they leave.

